
September 26, 2025
When rust strikes your vehicle, it’s more than just a cosmetic problem - it’s a gateway for potential structural damage. Addressing rust issues promptly not only helps maintain your car's appearance but also ensures its safety and longevity. In this comprehensive guide, we delve into the meticulous process of fitting a fender patch panel to repair rust damage, as demonstrated in the video. This step-by-step tutorial is designed for vehicle owners in Boise, Idaho, who prioritize professional, high-quality auto repairs and want to better understand the craftsmanship that goes into restoring their cars.
Rust on fenders is a common problem, especially in older vehicles or in regions with harsh winters that require road salt. Over time, rust compromises the integrity of the metal, leading to holes and weakened structural components. Properly installing a fender patch panel is a reliable way to eliminate rust, strengthen the vehicle’s frame, and maintain its aesthetic appeal. This tutorial walks you through the intricate process of preparing for and installing such a panel, ensuring a long-lasting repair.
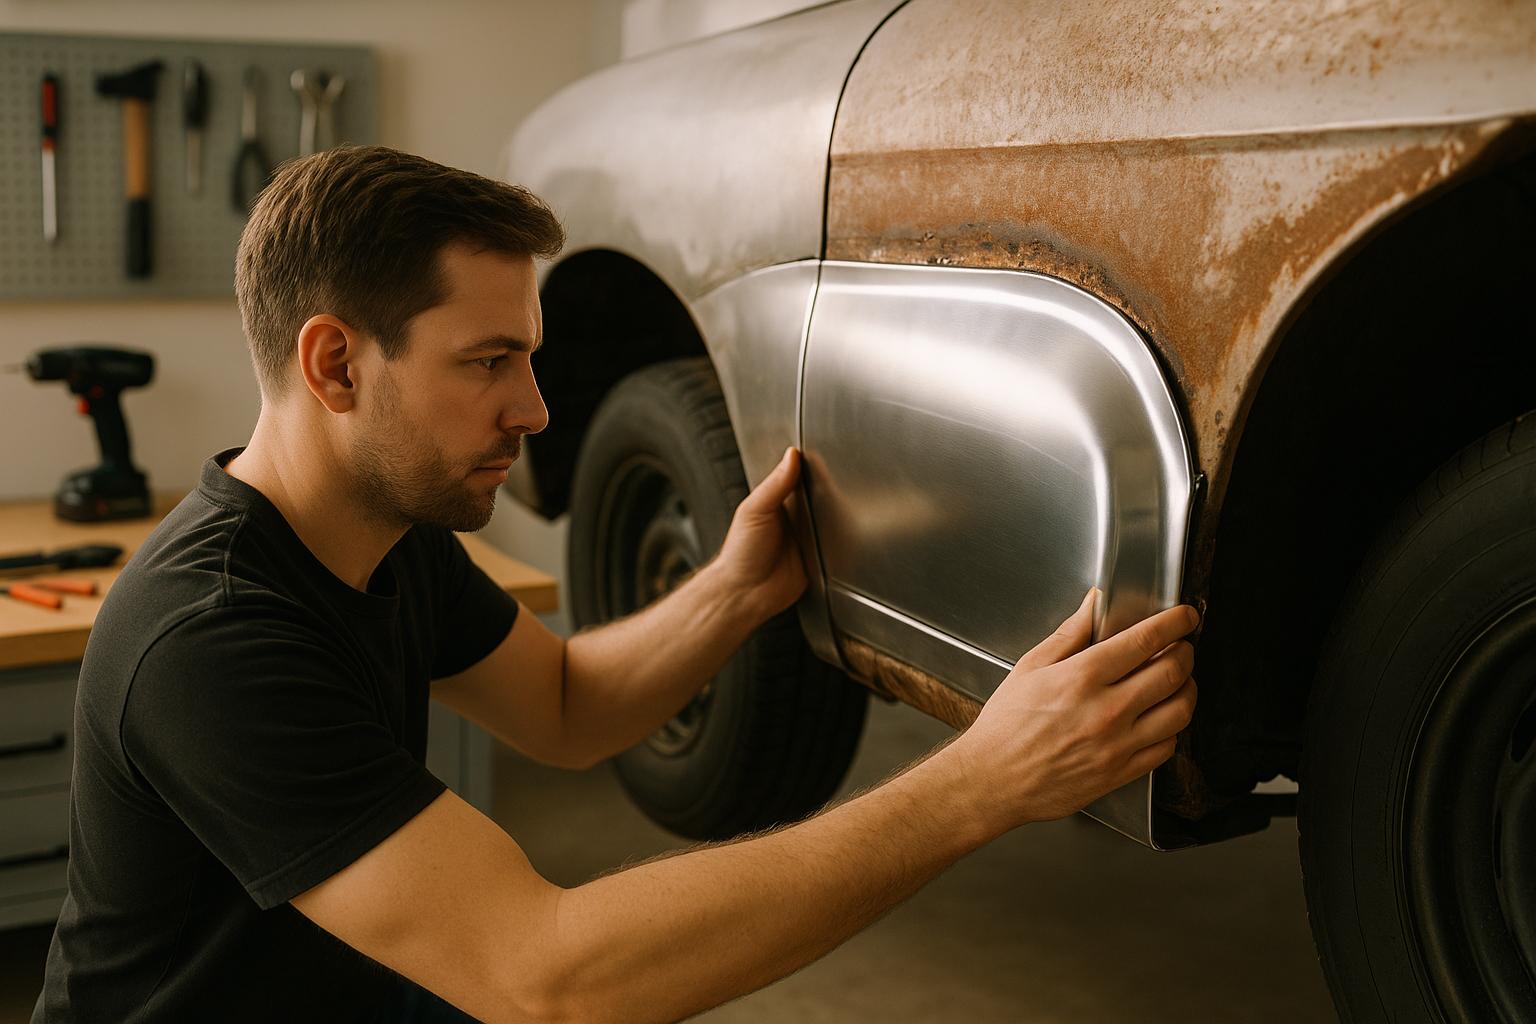
The first step in any rust repair is a thorough assessment of the damage. In the video, the rusted area on an old Chevrolet truck was carefully evaluated to determine how much of the fender needed to be replaced. This involved removing layers of rust and old metal until reaching clean, stable material.
Key Actions in This Step:
This step sets the foundation for a successful repair. By ensuring the area is rust-free and clean, you’re preventing future corrosion issues.
When working on a fender, it’s essential to clear the area of any components that might interfere with the repair. In this case, the gas filler neck was removed to keep it safe from sparks and to improve access to the inner fender during the repair process.
Why This Matters:
The core of the repair process is aligning and fitting the new patch panel to blend seamlessly with the existing fender.
Pro Tip: Always measure and cut conservatively. As stated in the video, "Once you cut the metal, you can’t put it back." It’s better to make multiple small adjustments than to risk removing too much material at once.
Before finalizing the installation, it’s crucial to test fit the patch panel.
Once satisfied with the fit of the new panel, the next step is to cut away the remaining rusted portion of the fender.
After cutting, the video emphasized the importance of cleaning the inner fender thoroughly. This prevents rust from forming again and ensures a solid foundation for welding the new panel.
With the prep work complete, the patch panel is ready to be installed.
Rust often affects not only the outer fender but also the inner structure. In the video, it was suggested that leftover metal pieces from the trimmed patch panel could be used to repair the inner fender.
For vehicle owners in Boise, Idaho, understanding the intricacies of rust repair can ease concerns and improve communication with repair professionals. Here are the highlights from this tutorial:
Fitting a fender patch panel is a meticulous process that requires patience and precision. By taking the time to clean, measure, and test fit, you can achieve a professional-quality repair that restores your vehicle’s structural integrity and appearance. Whether you’re tackling this project yourself or working with a trusted repair shop in Boise, Idaho, understanding these steps ensures you’re making informed decisions about your vehicle.
Rust doesn’t have to spell the end for your car’s fender. With the right approach, it’s possible to breathe new life into your vehicle and keep it roadworthy for years to come.
Source: "Rust repair the RIGHT way - part 2. Fitting the new panel to the fender." - Wags Automotive, YouTube, Aug 4, 2025 - https://www.youtube.com/watch?v=PPFMAythuBc
Use: Embedded for reference. Brief quotes used for commentary/review.
